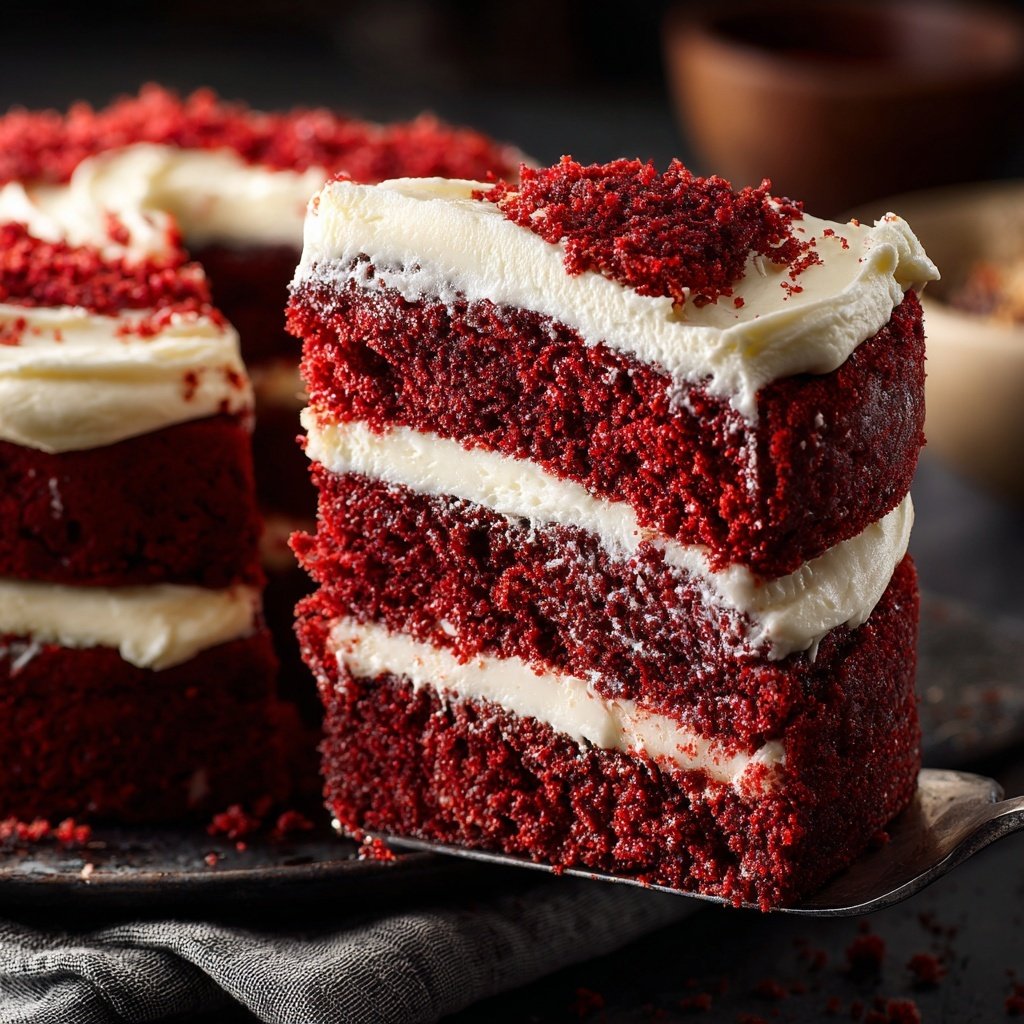
Red Velvet Cake for Valentine’s Day
Highlighted under: Joyful Food
I absolutely love making this Red Velvet Cake for Valentine’s Day! It’s an indulgent, rich dessert that not only looks stunning but also tastes incredible. The vibrant red color combined with creamy frosting creates the perfect romantic atmosphere. Each slice is a celebration of flavor and texture. Whether you’re making this for a loved one or treating yourself, it’s a heartfelt way to show affection. Join me in putting this recipe together, and watch as your loved ones delight in every bite!
When I first tried making Red Velvet Cake, I was a bit intimidated by the color and elegance. However, I learned that the key to achieving that perfect red hue lies in the right balance of cocoa powder and food coloring. After several attempts, I discovered the importance of using buttermilk, which not only adds moisture but also enhances the cake's flavor.
As I baked the cake, the aroma wafting through the kitchen was simply irresistible. I realized that allowing the cake to cool completely before frosting was crucial to achieving neat layers. Trust me, following this step will take your cake from good to spectacular!
Why You Will Love This Recipe
- Velvety texture that melts in your mouth
- Stunning red color that makes it perfect for celebrations
- Creamy frosting that balances the richness of the cake
The Importance of Ingredients
Using high-quality ingredients is essential for achieving the perfect Red Velvet Cake. The vegetable oil not only keeps the cake moist but also contributes to its velvety texture, making it tender. If you're out of vegetable oil, you can substitute it with canola oil or melted coconut oil—just ensure it remains neutral in flavor to allow the cake's unique taste to shine through.
Buttermilk is another crucial component. It adds a subtle tanginess that balances the sweetness and enhances the cake's overall flavor. If you don't have buttermilk on hand, a simple substitute can be made by mixing one cup of milk with one tablespoon of vinegar or lemon juice. Let it sit for about five minutes to thicken before adding it to the batter.
Mixing Techniques and Baking Tips
When combining the wet and dry ingredients, mix until just combined to prevent overworking the batter. Overmixing can lead to a denser cake, losing the light and airy texture we aim for. The reaction between vinegar and baking soda is what gives the Red Velvet Cake its signature lift, so fold them in gently but thoroughly to ensure an even distribution throughout the batter.
As for baking, keep a keen eye on your cakes after about 25 minutes. The cakes should spring back when lightly pressed in the center, and a toothpick inserted should come out clean or with a few crumbs, but not wet batter. If the cakes seem to be browning too quickly, you can tent them with foil for the last few minutes to prevent burning.
Ingredients
Ingredients for Red Velvet Cake
For the Cake
- 2 ½ cups all-purpose flour
- 1 ½ cups granulated sugar
- 1 cup vegetable oil
- 1 cup buttermilk, room temperature
- 2 large eggs, room temperature
- 2 tablespoons red food coloring
- 1 teaspoon vanilla extract
- 1 teaspoon baking soda
- 1 teaspoon white vinegar
- ½ teaspoon salt
- 1 tablespoon unsweetened cocoa powder
For the Cream Cheese Frosting
- 8 oz cream cheese, softened
- ½ cup unsalted butter, softened
- 4 cups powdered sugar
- 1 teaspoon vanilla extract
- 2 tablespoons milk, if needed
Prepare Your Ingredients
Instructions
Instructions
Preheat the Oven
Preheat your oven to 350°F (175°C) and prepare two 9-inch round cake pans by greasing them and lining the bottoms with parchment paper.
Mix Dry Ingredients
In a medium bowl, whisk together the flour, cocoa powder, baking soda, and salt. Set aside.
Combine Wet Ingredients
In a large bowl, mix the sugar and vegetable oil until well combined. Add the buttermilk, eggs, food coloring, and vanilla extract, and beat on medium speed until smooth.
Combine All Ingredients
Gradually add the dry ingredients to the wet mixture, mixing until just combined. In a small bowl, stir together the vinegar and baking soda, then fold it into the cake batter until fully incorporated.
Bake the Cakes
Divide the batter equally between the prepared pans and bake for 30 minutes or until a toothpick inserted into the center comes out clean. Let the cakes cool in the pans for 10 minutes before transferring them to a wire rack to cool completely.
Prepare the Frosting
While the cakes cool, prepare the cream cheese frosting by beating the cream cheese and butter together until smooth. Gradually add powdered sugar, mixing until desired consistency is reached. Add milk if necessary, then mix in the vanilla extract.
Frost the Cake
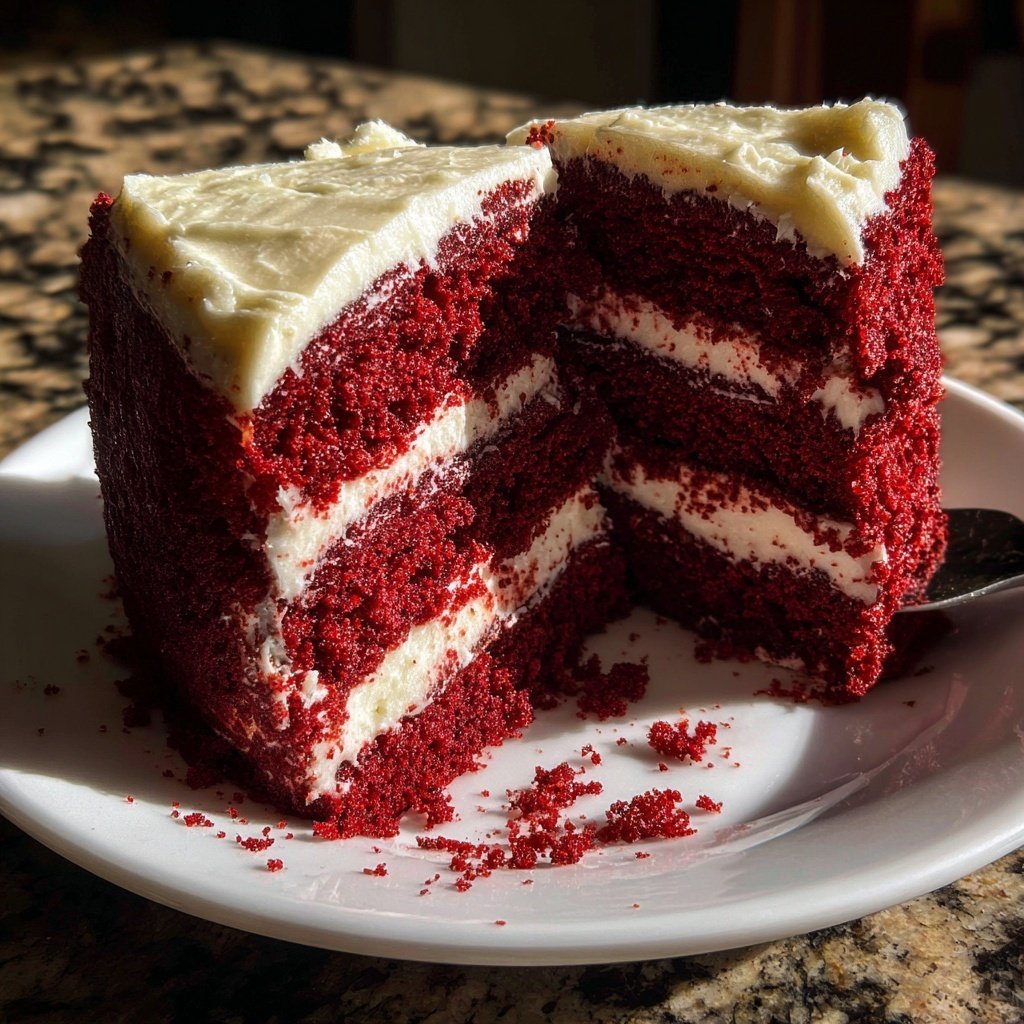
Once the cakes are completely cooled, place one layer on a serving plate and spread a portion of the frosting on top. Add the second layer and cover the entire cake with the remaining frosting.
Serve and Enjoy
Cut a slice and enjoy your delicious Red Velvet Cake! Perfect for sharing with loved ones on Valentine’s Day.
Enjoy Your Creation!
Pro Tips
- To enhance the red color, use high-quality food coloring and make sure your ingredients are at room temperature for the best results.
Perfecting the Cream Cheese Frosting
Achieving a smooth cream cheese frosting is vital for both taste and presentation. Start with softened cream cheese and butter to avoid lumps. Beat them together until it reaches a glossy, creamy consistency before gradually adding the powdered sugar. This gradual addition helps to avoid a cloud of sugar and ensures it mixes evenly without forming grainy lumps.
If your frosting is too thick, add milk one tablespoon at a time until you reach the desired spreadability. Aim for a consistency that is thick enough to hold its shape when spread, but creamy enough to glide over the cake easily. A flexible offset spatula can help achieve a smooth finish, while a piping bag can add decorative touches for special occasions.
Storage and Serving Suggestions
To keep your Red Velvet Cake fresh, store it in an airtight container in the refrigerator. It can last up to a week when properly sealed. Allow the cake to come to room temperature before serving for the best flavor and texture. For longer storage, you can freeze individual slices or even the whole cake wrapped tightly in plastic wrap, followed by aluminum foil, for up to three months.
For serving ideas, consider garnishing the cake with fresh berries or a dusting of cocoa powder for an elegant touch. If you're feeling adventurous, you can also experiment by adding a layer of chocolate ganache between the cake layers for a richer flavor. This slight twist enhances the overall experience while maintaining the classic Red Velvet essence.
Questions About Recipes
→ Can I make this cake in advance?
Yes, you can bake the cake layers a day in advance. Just ensure they're properly cooled and stored in an airtight container.
→ Is there a substitute for buttermilk?
You can use regular milk with a tablespoon of vinegar or lemon juice to create a buttermilk substitute.
→ Can I freeze the Red Velvet Cake?
Yes, you can freeze the unfrosted cake layers. Wrap them tightly in plastic wrap and store them in the freezer for up to 3 months.
→ What can I use instead of cream cheese for the frosting?
You can use mascarpone cheese or a buttercream frosting made with unsalted butter if you want a non-cream cheese option.
Red Velvet Cake for Valentine’s Day
Created by: Cleo Winter
Recipe Type: Joyful Food
Skill Level: Intermediate
Final Quantity: 8 servings
What You'll Need
For the Cake
- 2 ½ cups all-purpose flour
- 1 ½ cups granulated sugar
- 1 cup vegetable oil
- 1 cup buttermilk, room temperature
- 2 large eggs, room temperature
- 2 tablespoons red food coloring
- 1 teaspoon vanilla extract
- 1 teaspoon baking soda
- 1 teaspoon white vinegar
- ½ teaspoon salt
- 1 tablespoon unsweetened cocoa powder
For the Cream Cheese Frosting
- 8 oz cream cheese, softened
- ½ cup unsalted butter, softened
- 4 cups powdered sugar
- 1 teaspoon vanilla extract
- 2 tablespoons milk, if needed
How-To Steps
Preheat your oven to 350°F (175°C) and prepare two 9-inch round cake pans by greasing them and lining the bottoms with parchment paper.
In a medium bowl, whisk together the flour, cocoa powder, baking soda, and salt. Set aside.
In a large bowl, mix the sugar and vegetable oil until well combined. Add the buttermilk, eggs, food coloring, and vanilla extract, and beat on medium speed until smooth.
Gradually add the dry ingredients to the wet mixture, mixing until just combined. In a small bowl, stir together the vinegar and baking soda, then fold it into the cake batter until fully incorporated.
Divide the batter equally between the prepared pans and bake for 30 minutes or until a toothpick inserted into the center comes out clean. Let the cakes cool in the pans for 10 minutes before transferring them to a wire rack to cool completely.
While the cakes cool, prepare the cream cheese frosting by beating the cream cheese and butter together until smooth. Gradually add powdered sugar, mixing until desired consistency is reached. Add milk if necessary, then mix in the vanilla extract.
Once the cakes are completely cooled, place one layer on a serving plate and spread a portion of the frosting on top. Add the second layer and cover the entire cake with the remaining frosting.
Cut a slice and enjoy your delicious Red Velvet Cake! Perfect for sharing with loved ones on Valentine’s Day.
Extra Tips
- To enhance the red color, use high-quality food coloring and make sure your ingredients are at room temperature for the best results.
Nutritional Breakdown (Per Serving)
- Calories: 380 kcal
- Total Fat: 26g
- Saturated Fat: 15g
- Cholesterol: 195mg
- Sodium: 85mg
- Total Carbohydrates: 32g
- Dietary Fiber: 3g
- Sugars: 24g
- Protein: 6g